
Click Here to view PDF
NOTE: THIS WILL SHOW YOU HOW TO REPLACE ALL FOUR VALVES BUT CAN BE USED TO REPLACE ANY OF THE FOUR VALVES IN ORDER.
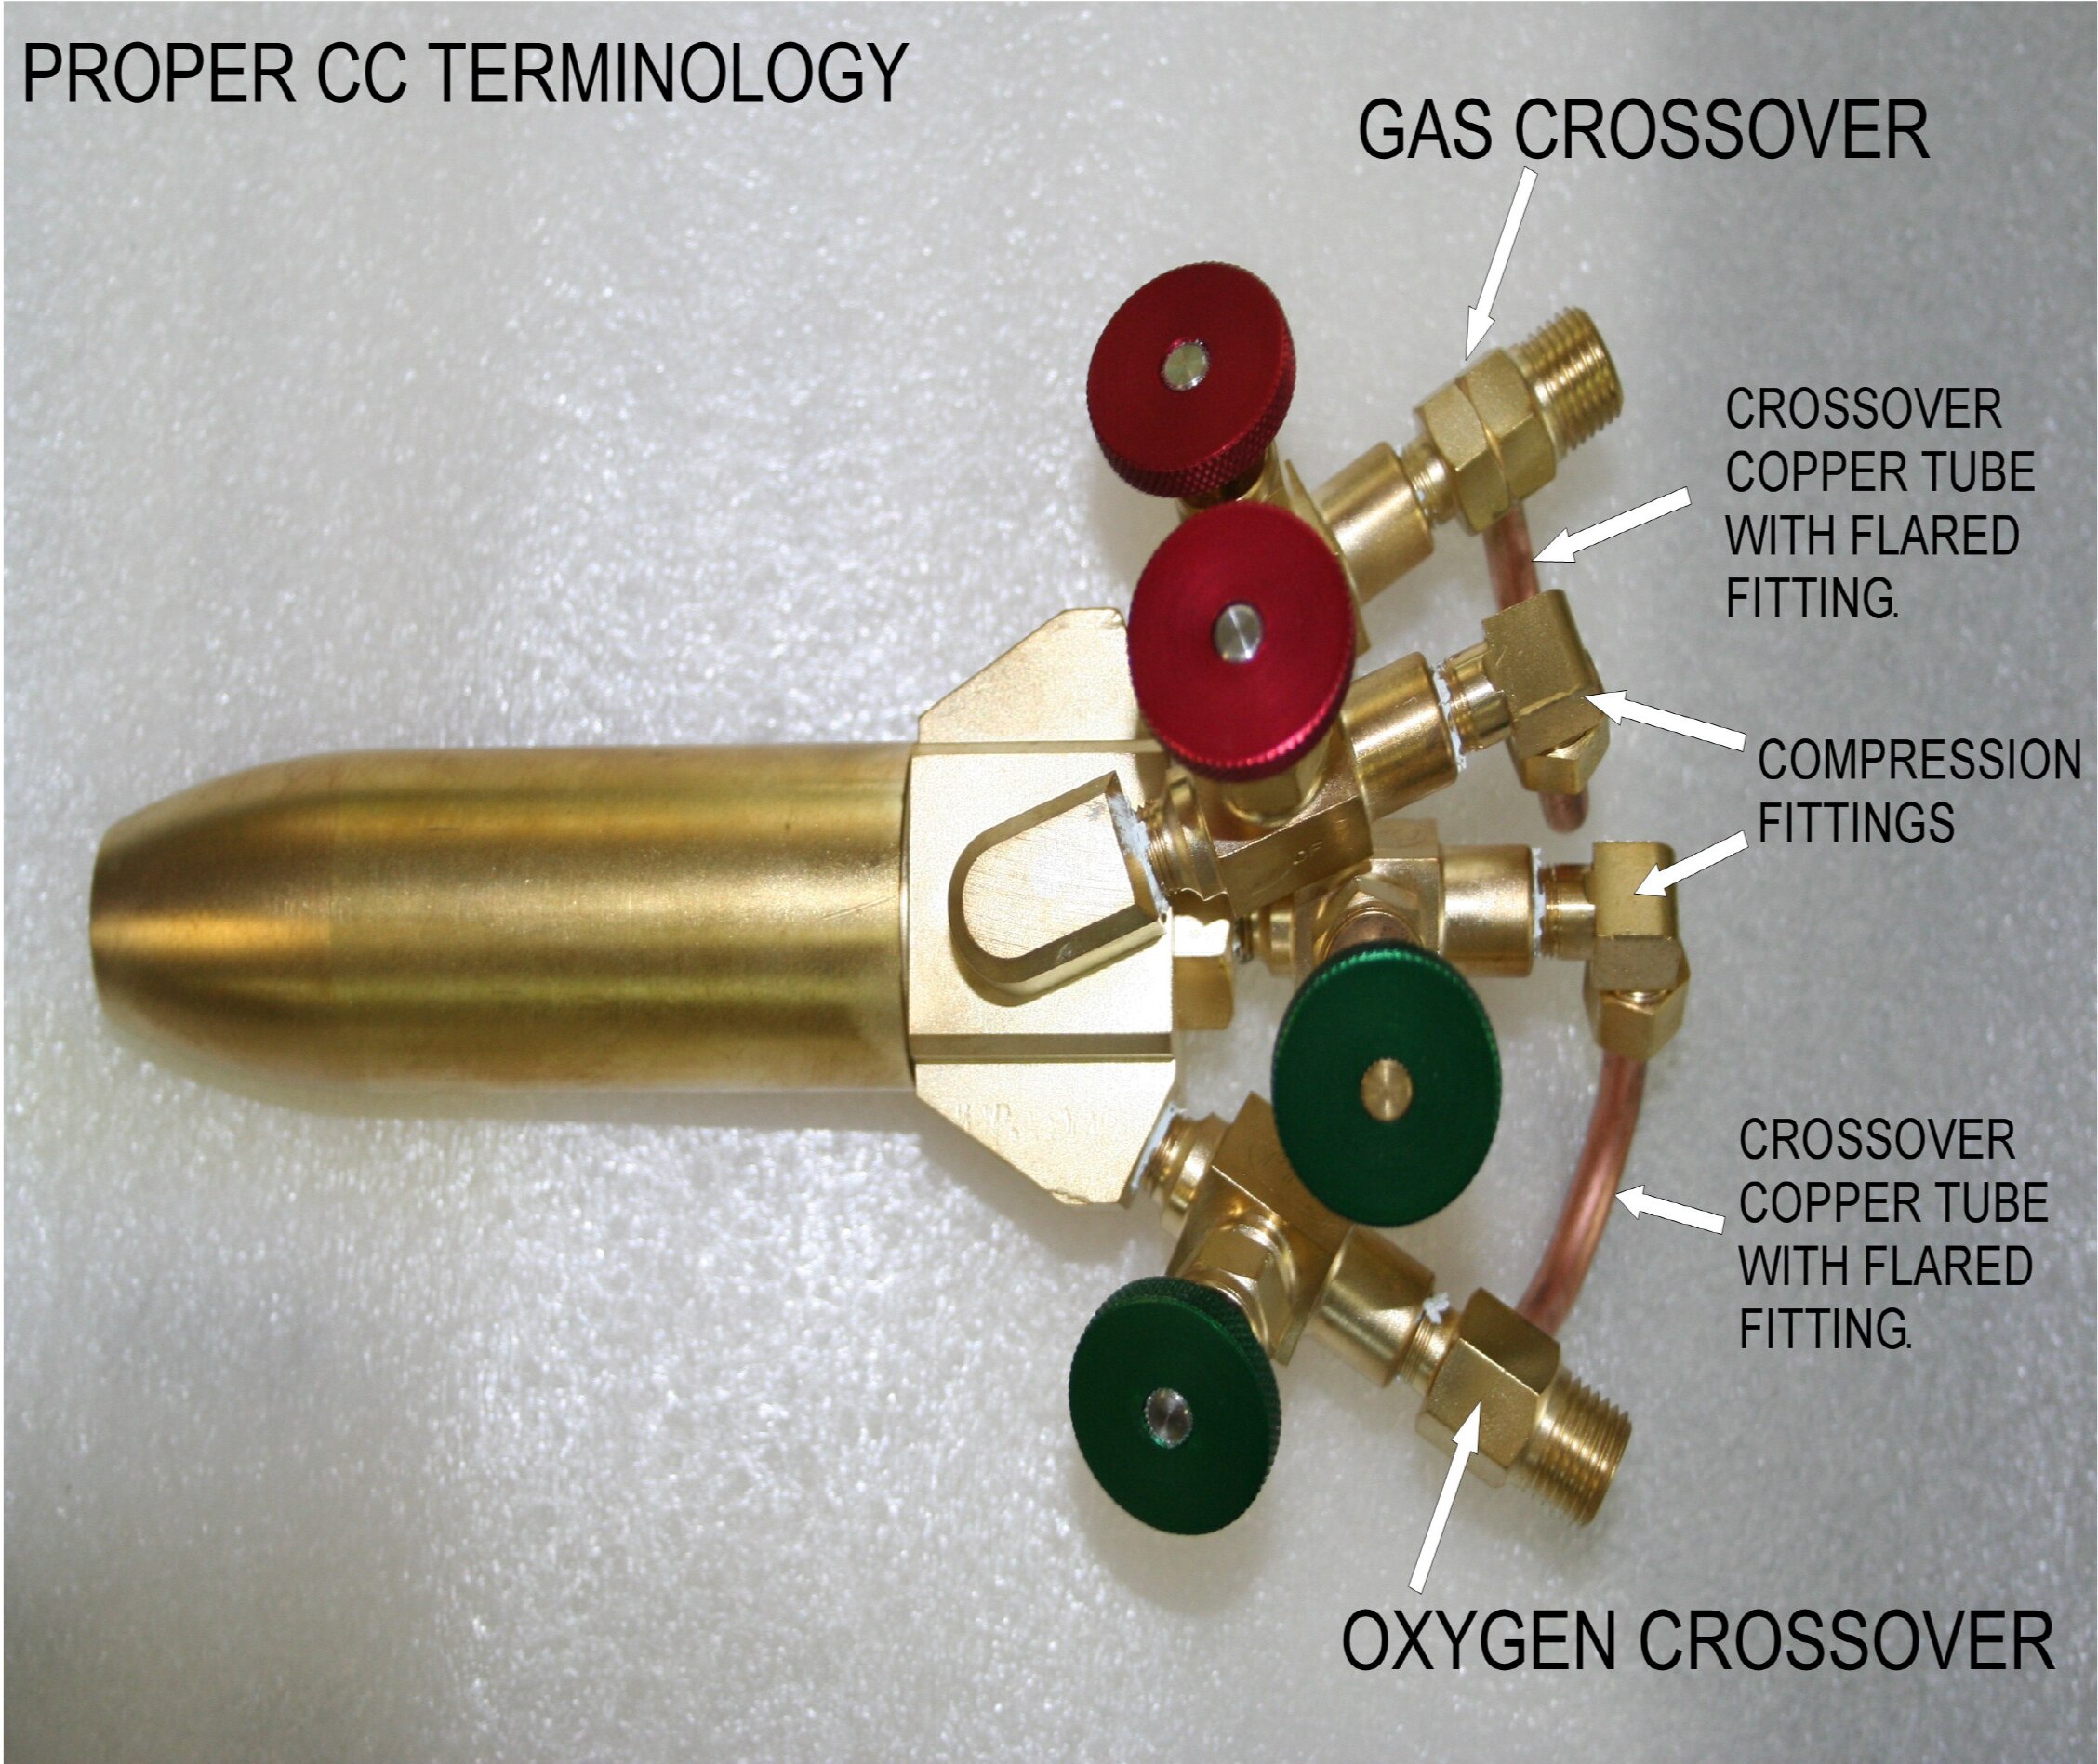
Below are some of the proper terms used to describe the components you may have to work with to replace your valves.
Using the proper terms when calling will greatly assist your Carlisle representative. (800)-922-1167.
NOTE: REMEMBER TO LEAK TEST THE NEW VALVES WHEN INSTALLATION IS COMPLETE.
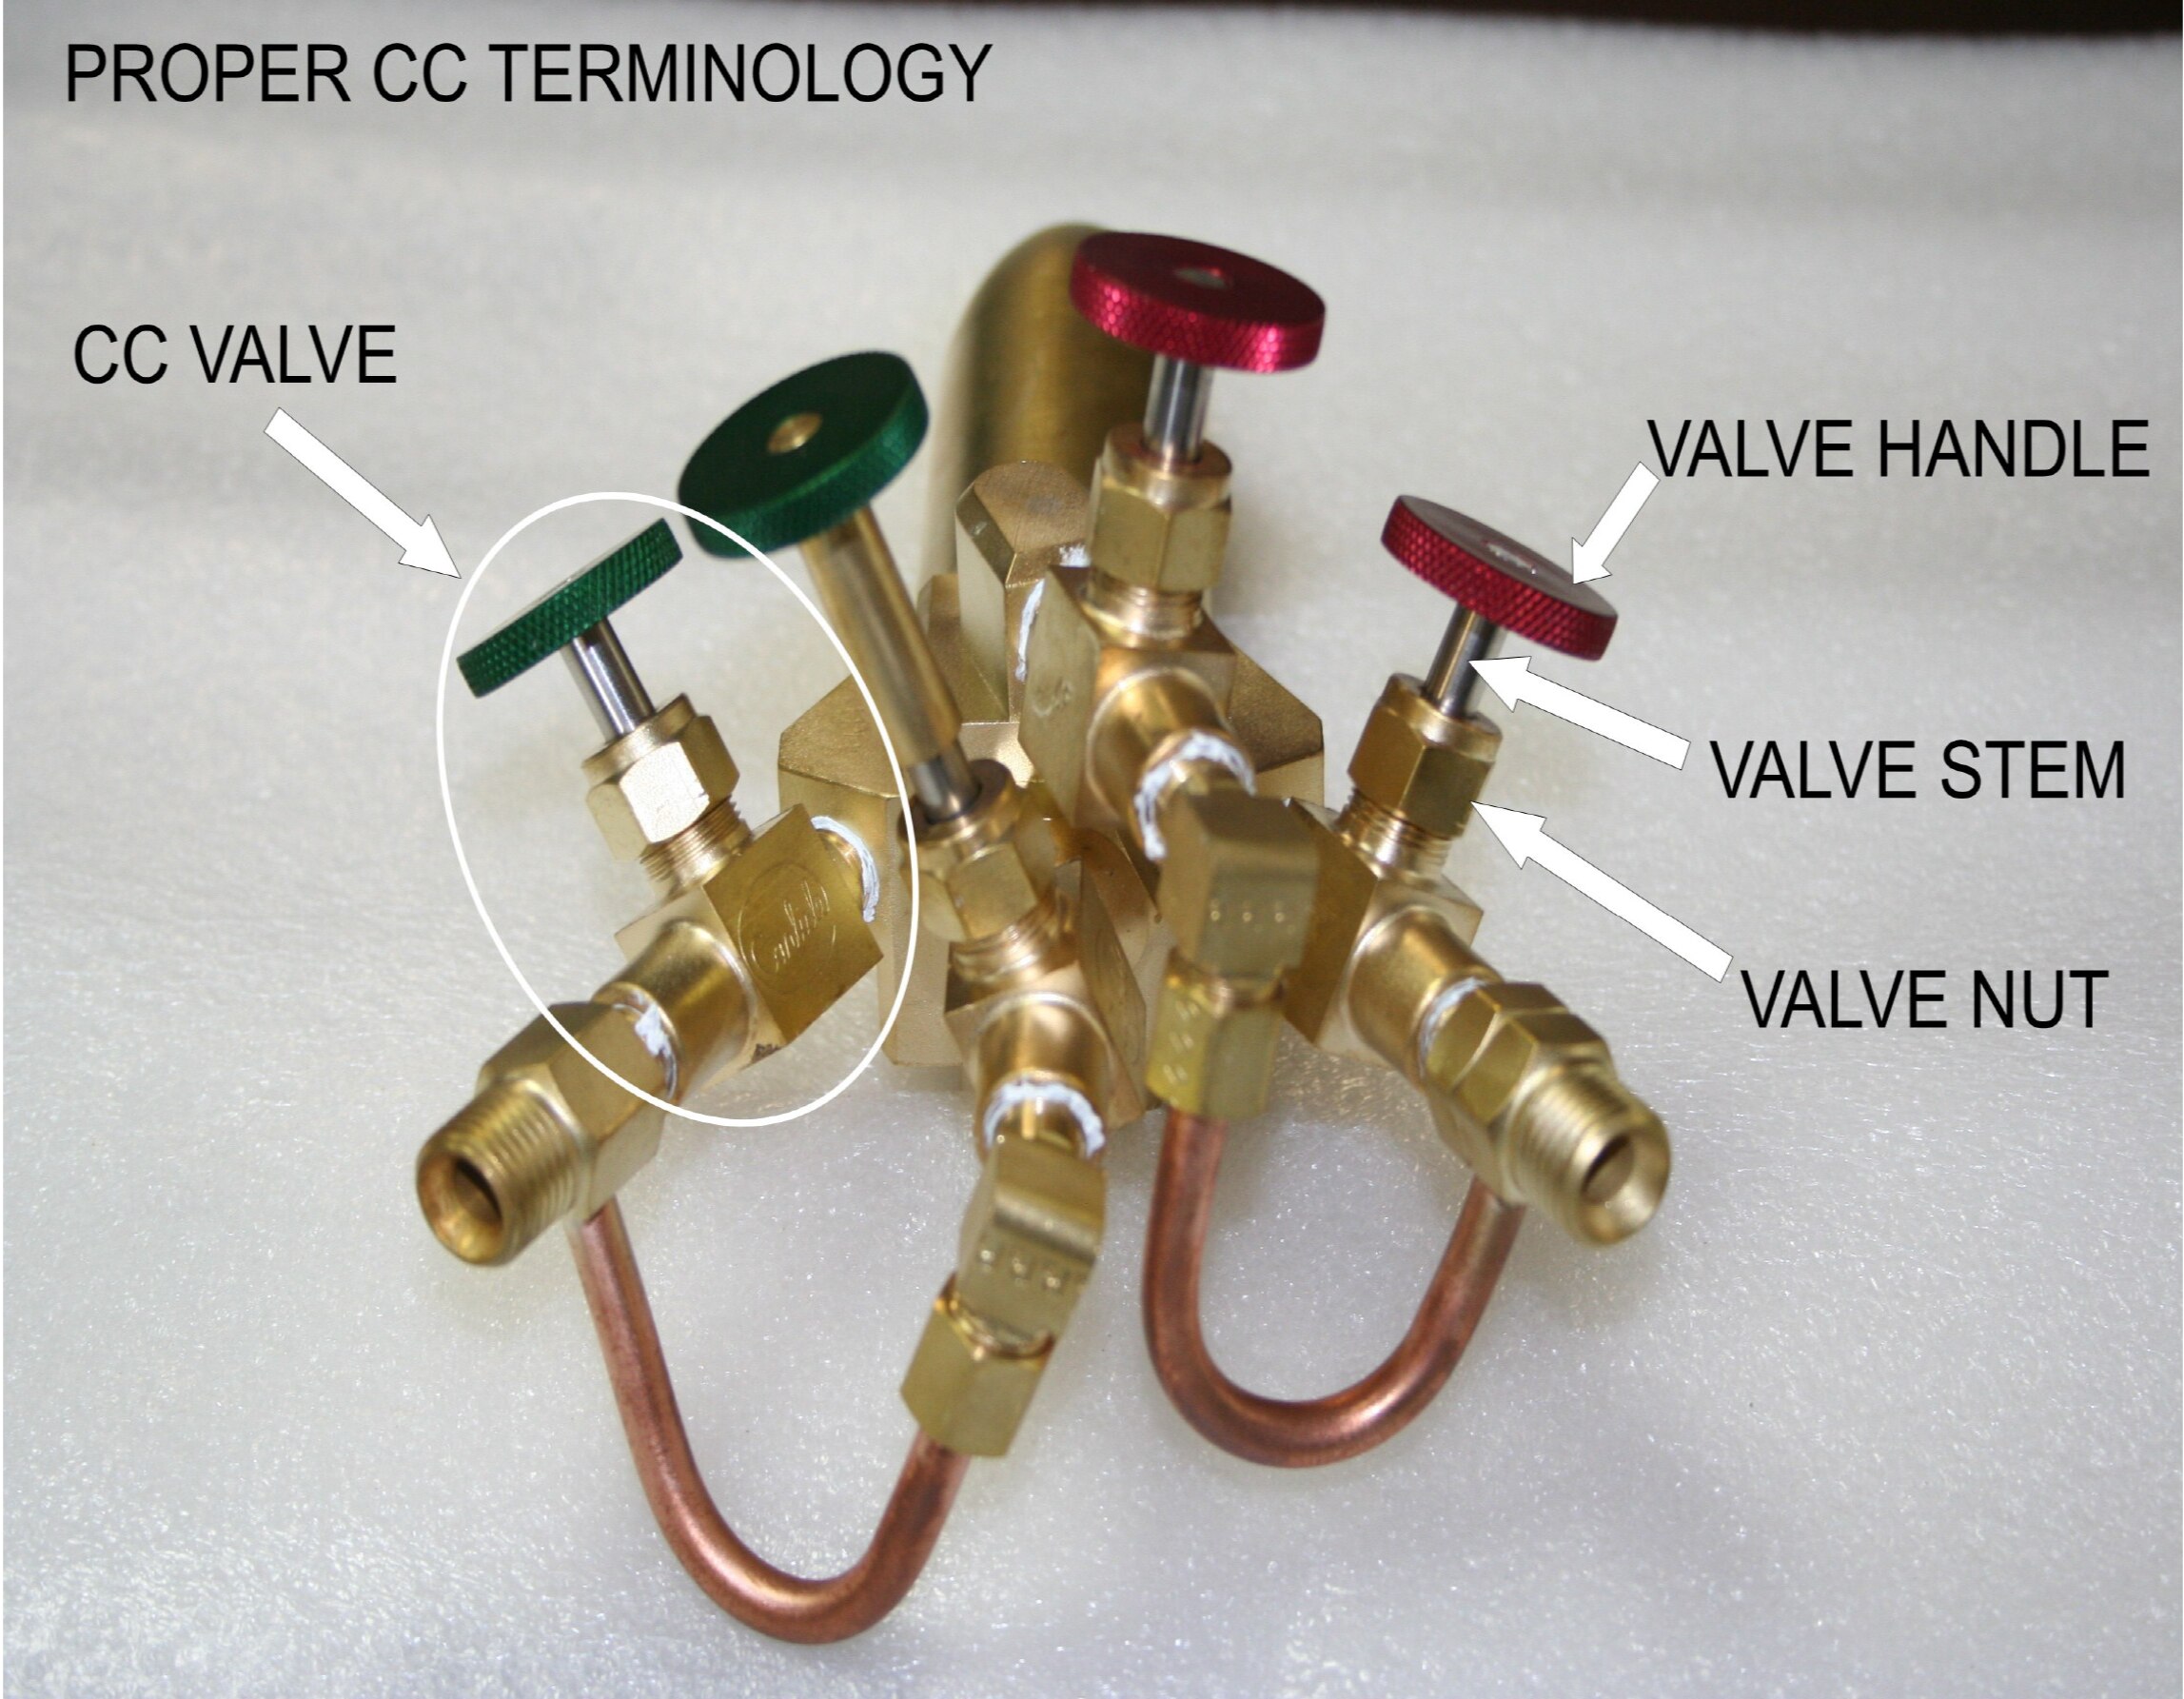
Below are some of the proper terms used to describe the valve components you may have to work with to replace your valves.
Using the proper terms when calling will greatly assist your Carlisle representative. (800)-922-1167.
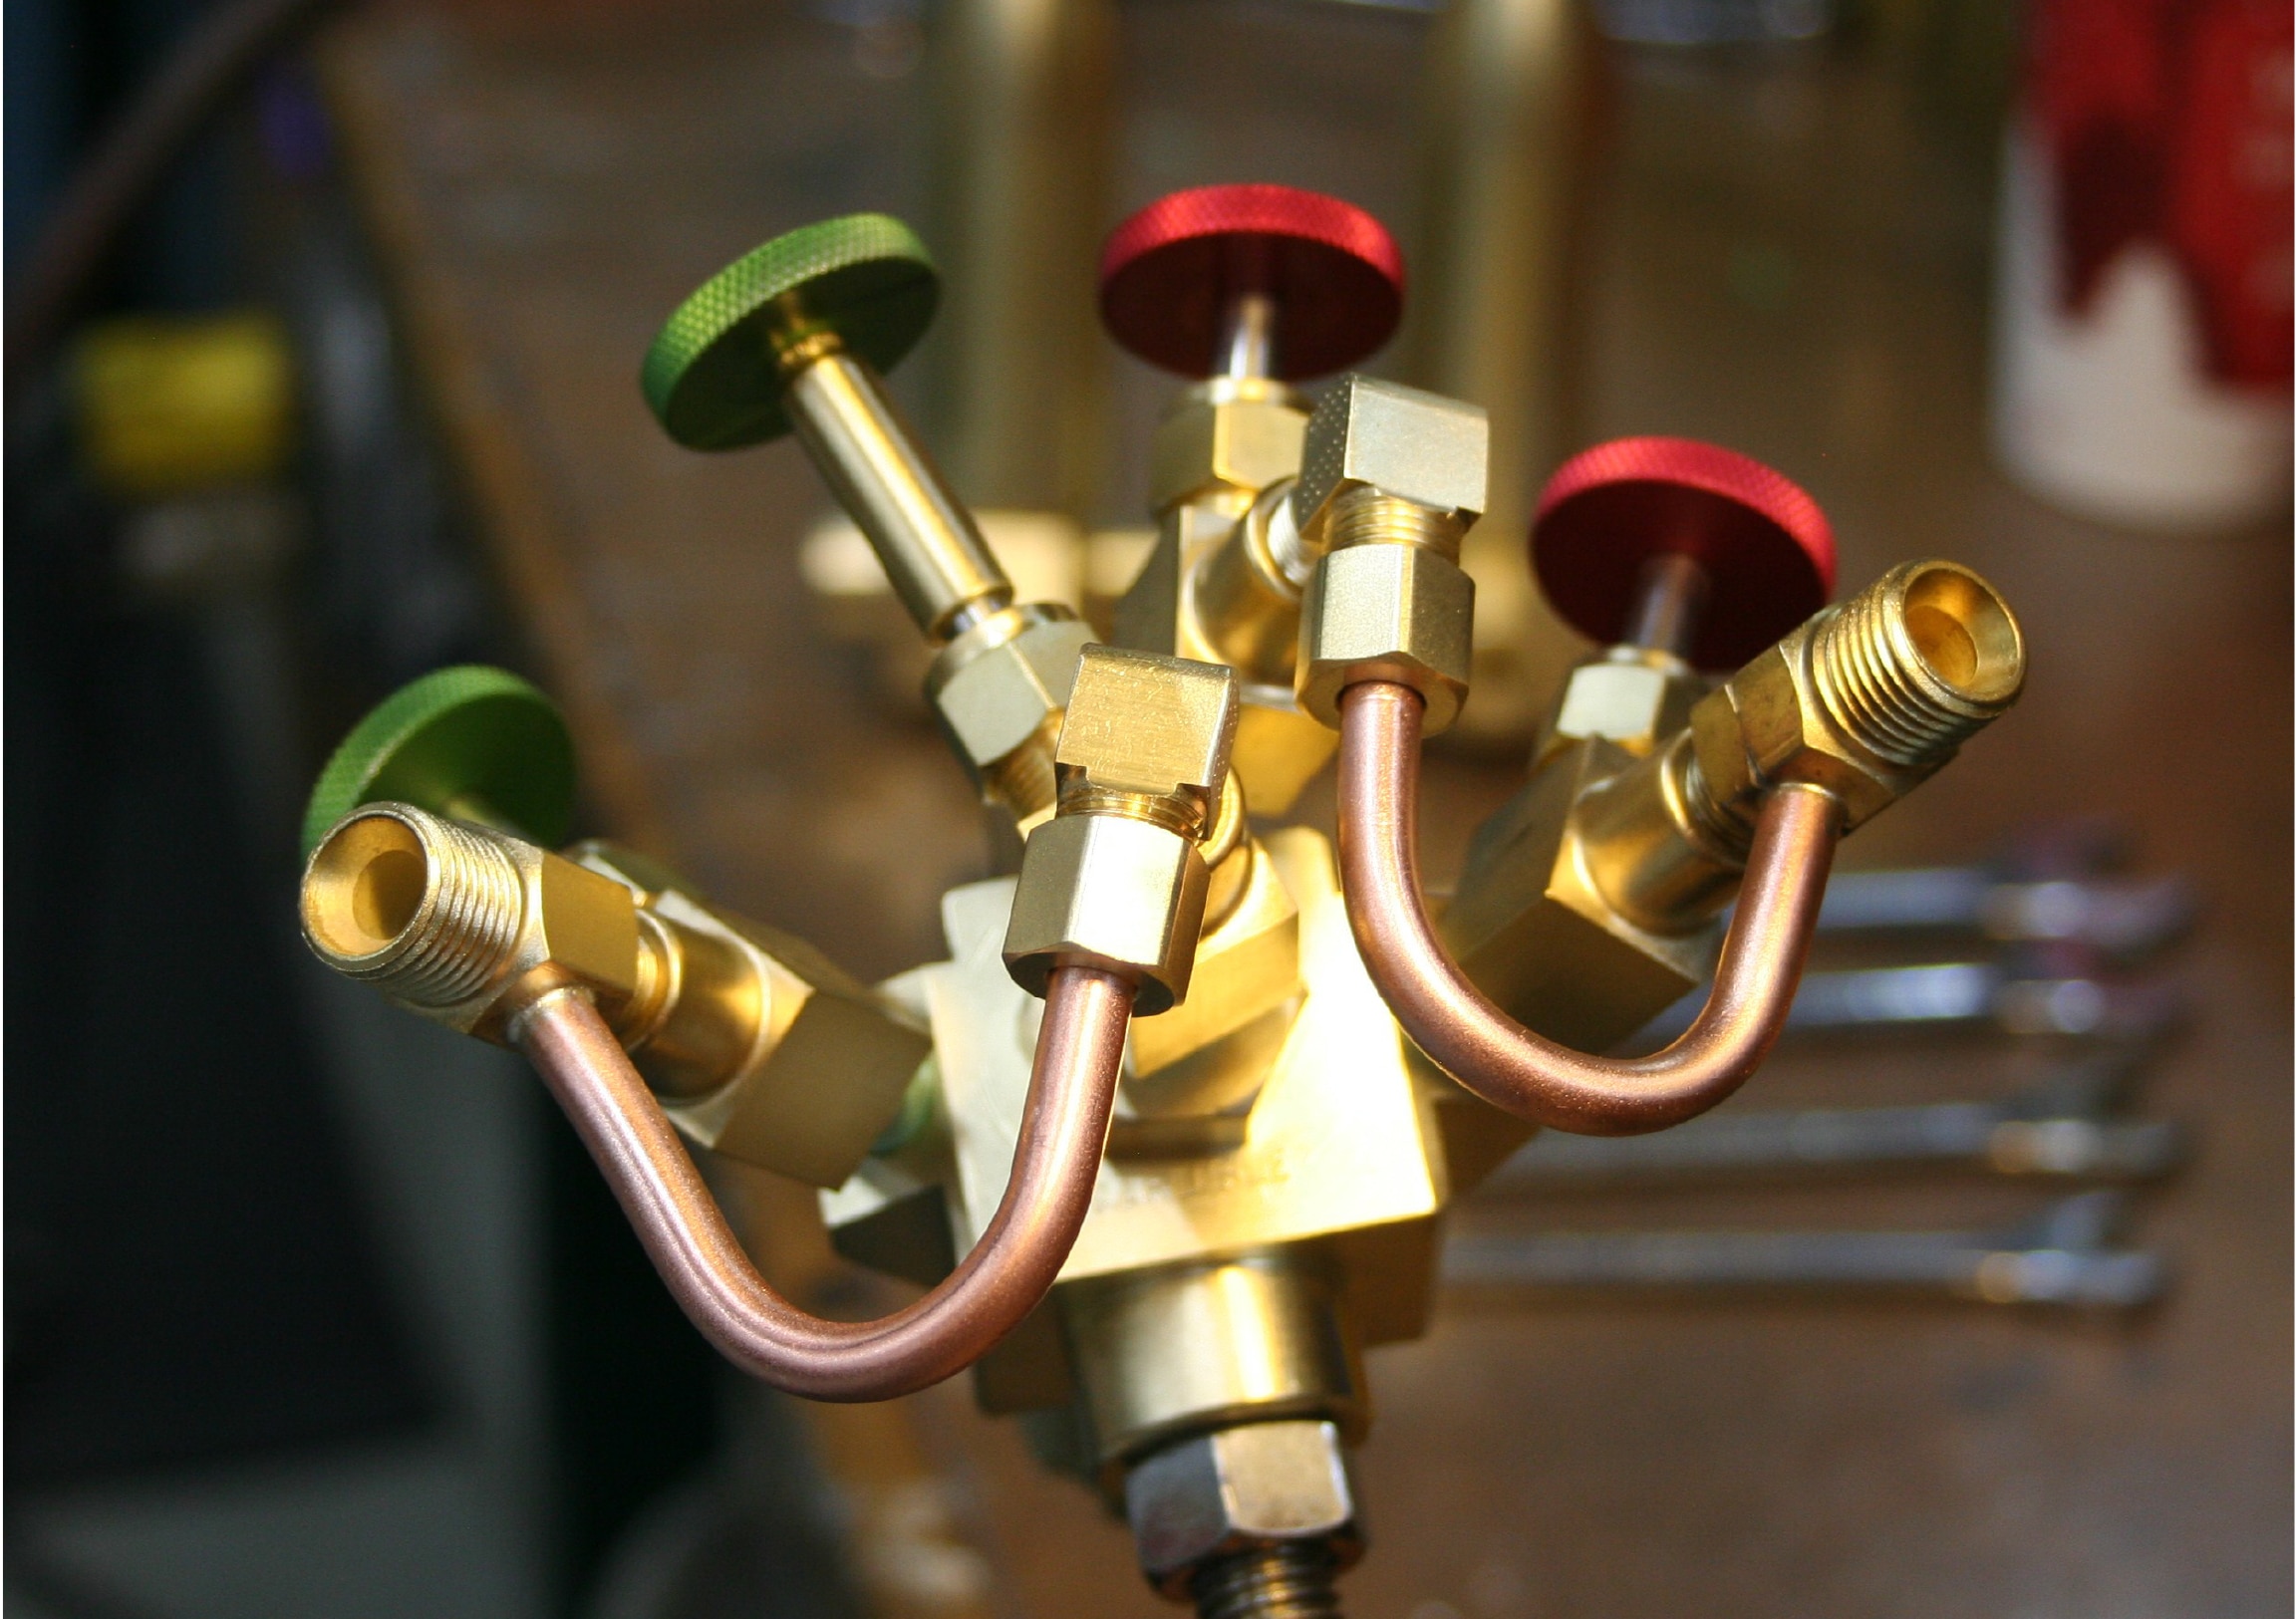
These instructions will show you how to remove all the valves from the back of your CC in order.
Of course if you are only changing one or two valves then stop where you need to.
Keep in mind you will need to remove either the gas or oxygen crossover on a 2 inlet torch to replace a valve.
NOTE: USE A SUITABLE GAS/OXY SAFE PIPE JOINING COMPOUND WHEN INSTALLING NEW VALVE AND CROSSOVERS.
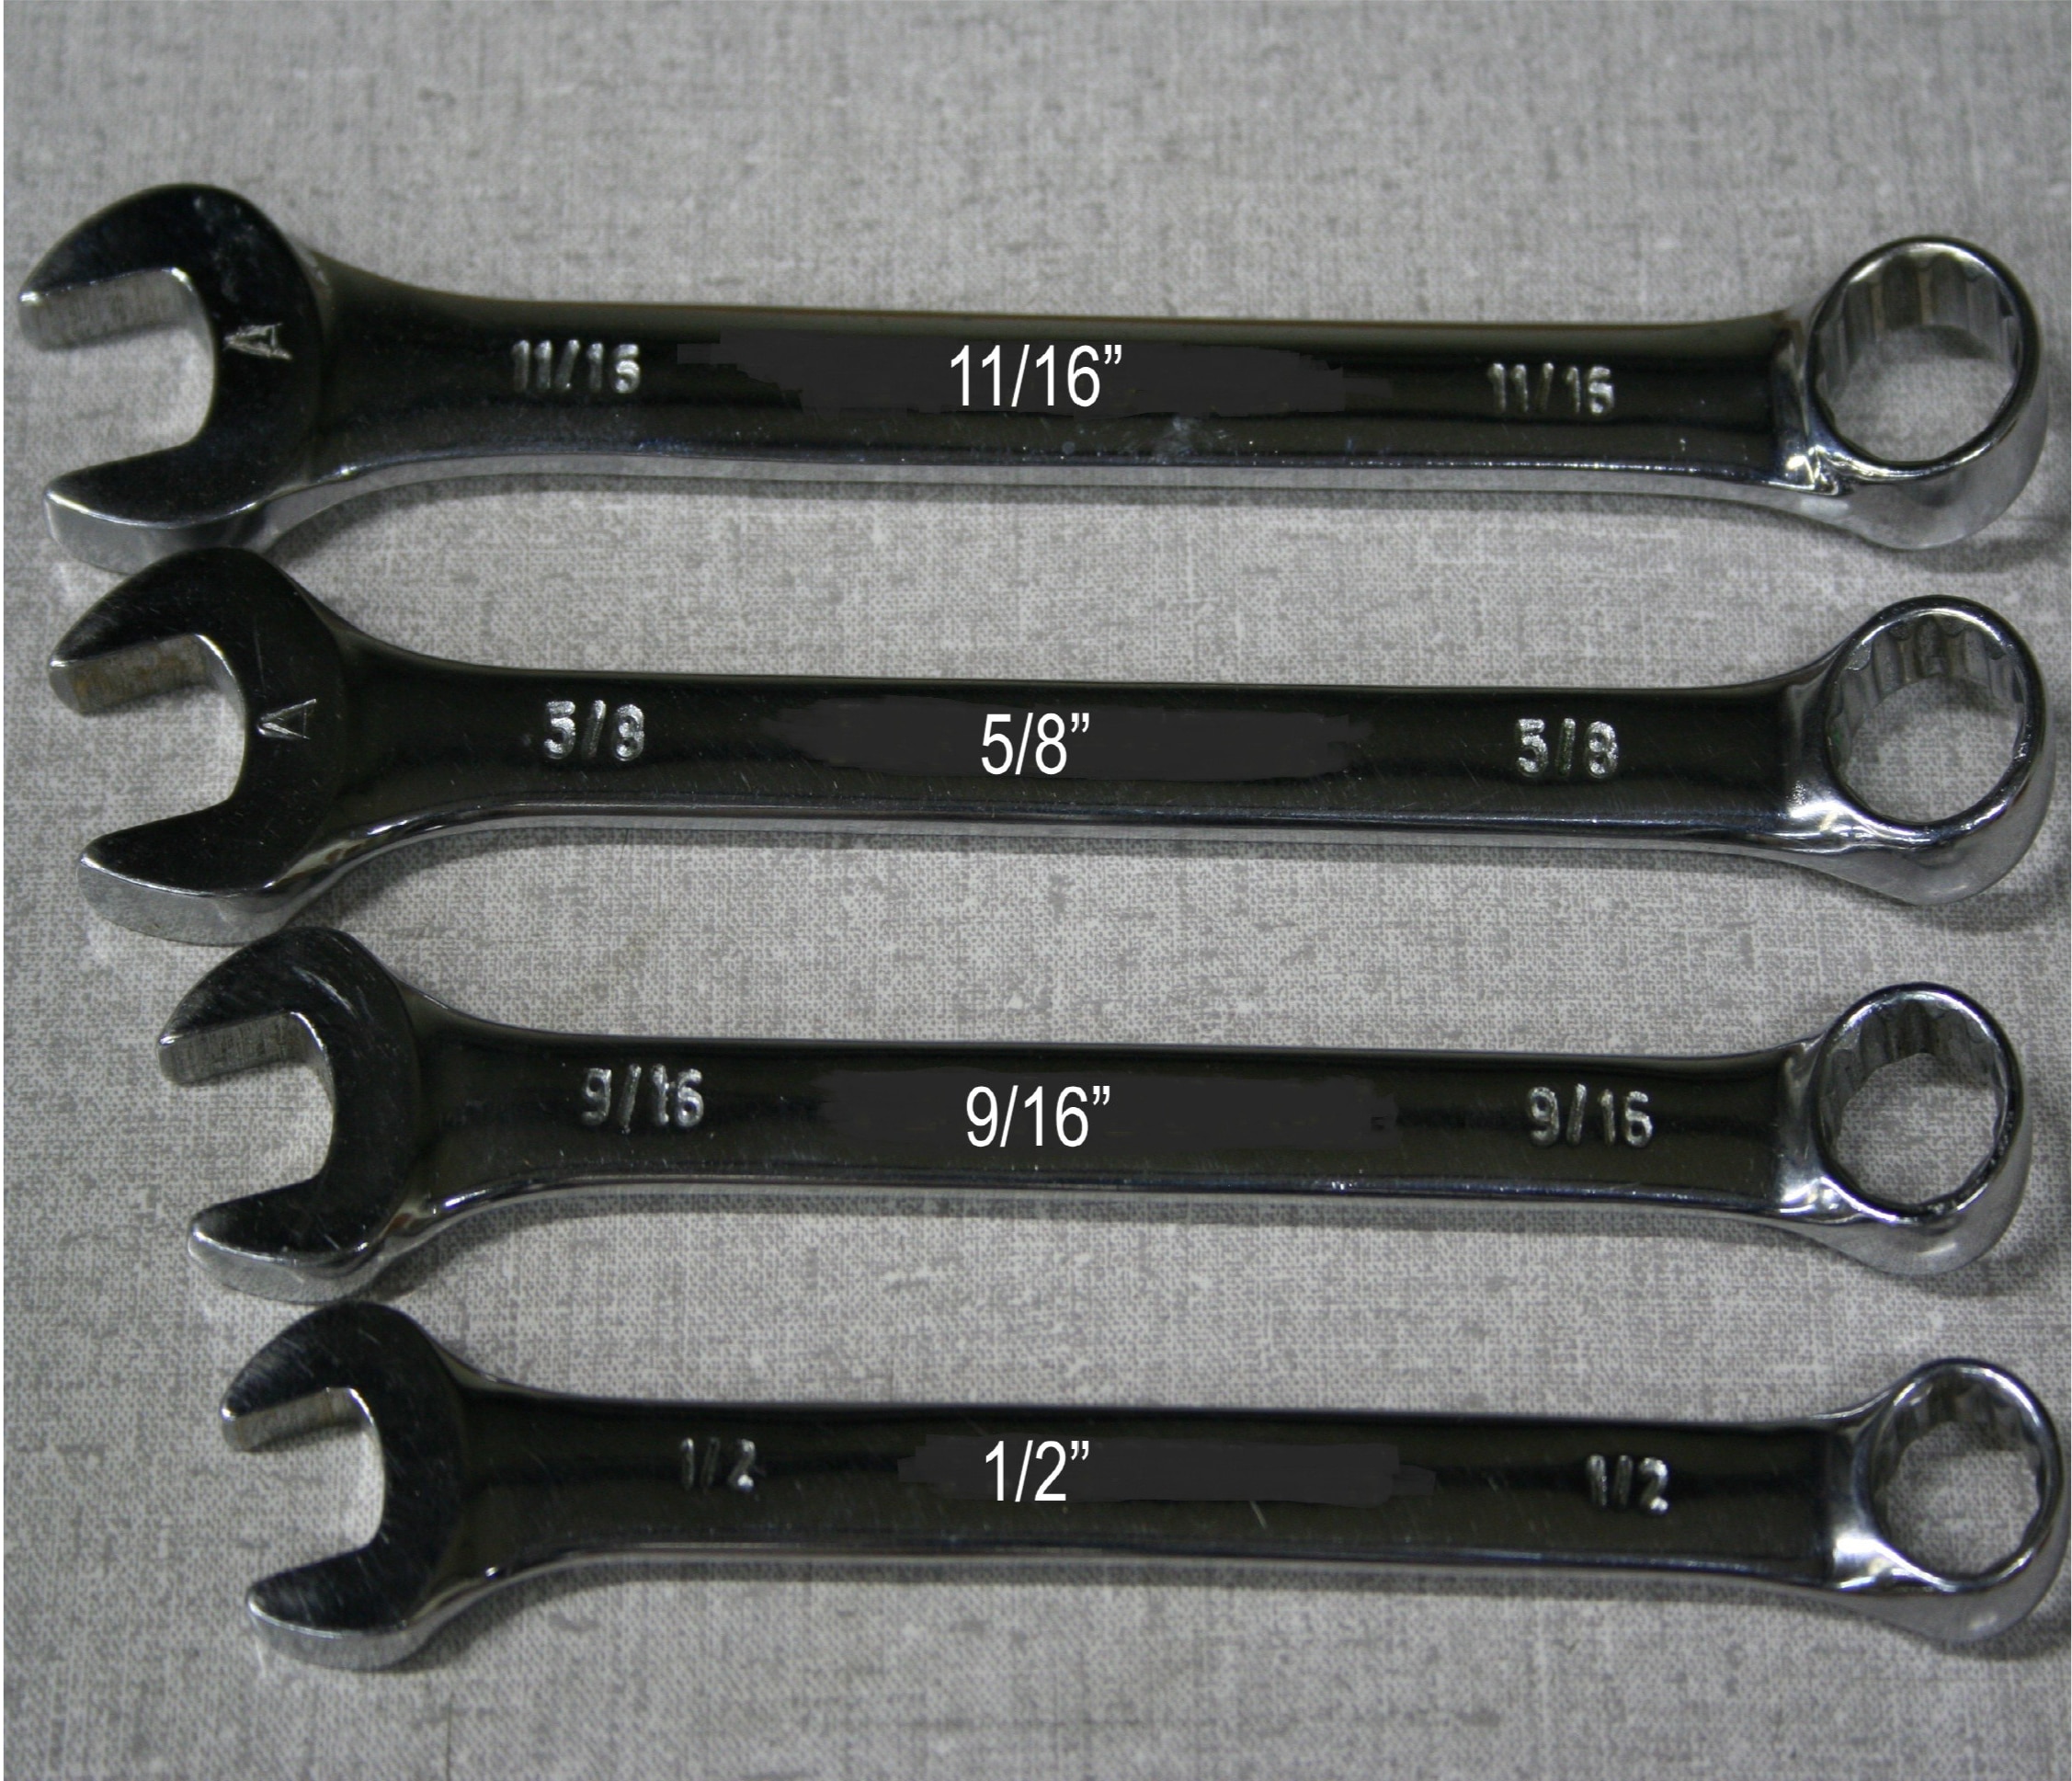
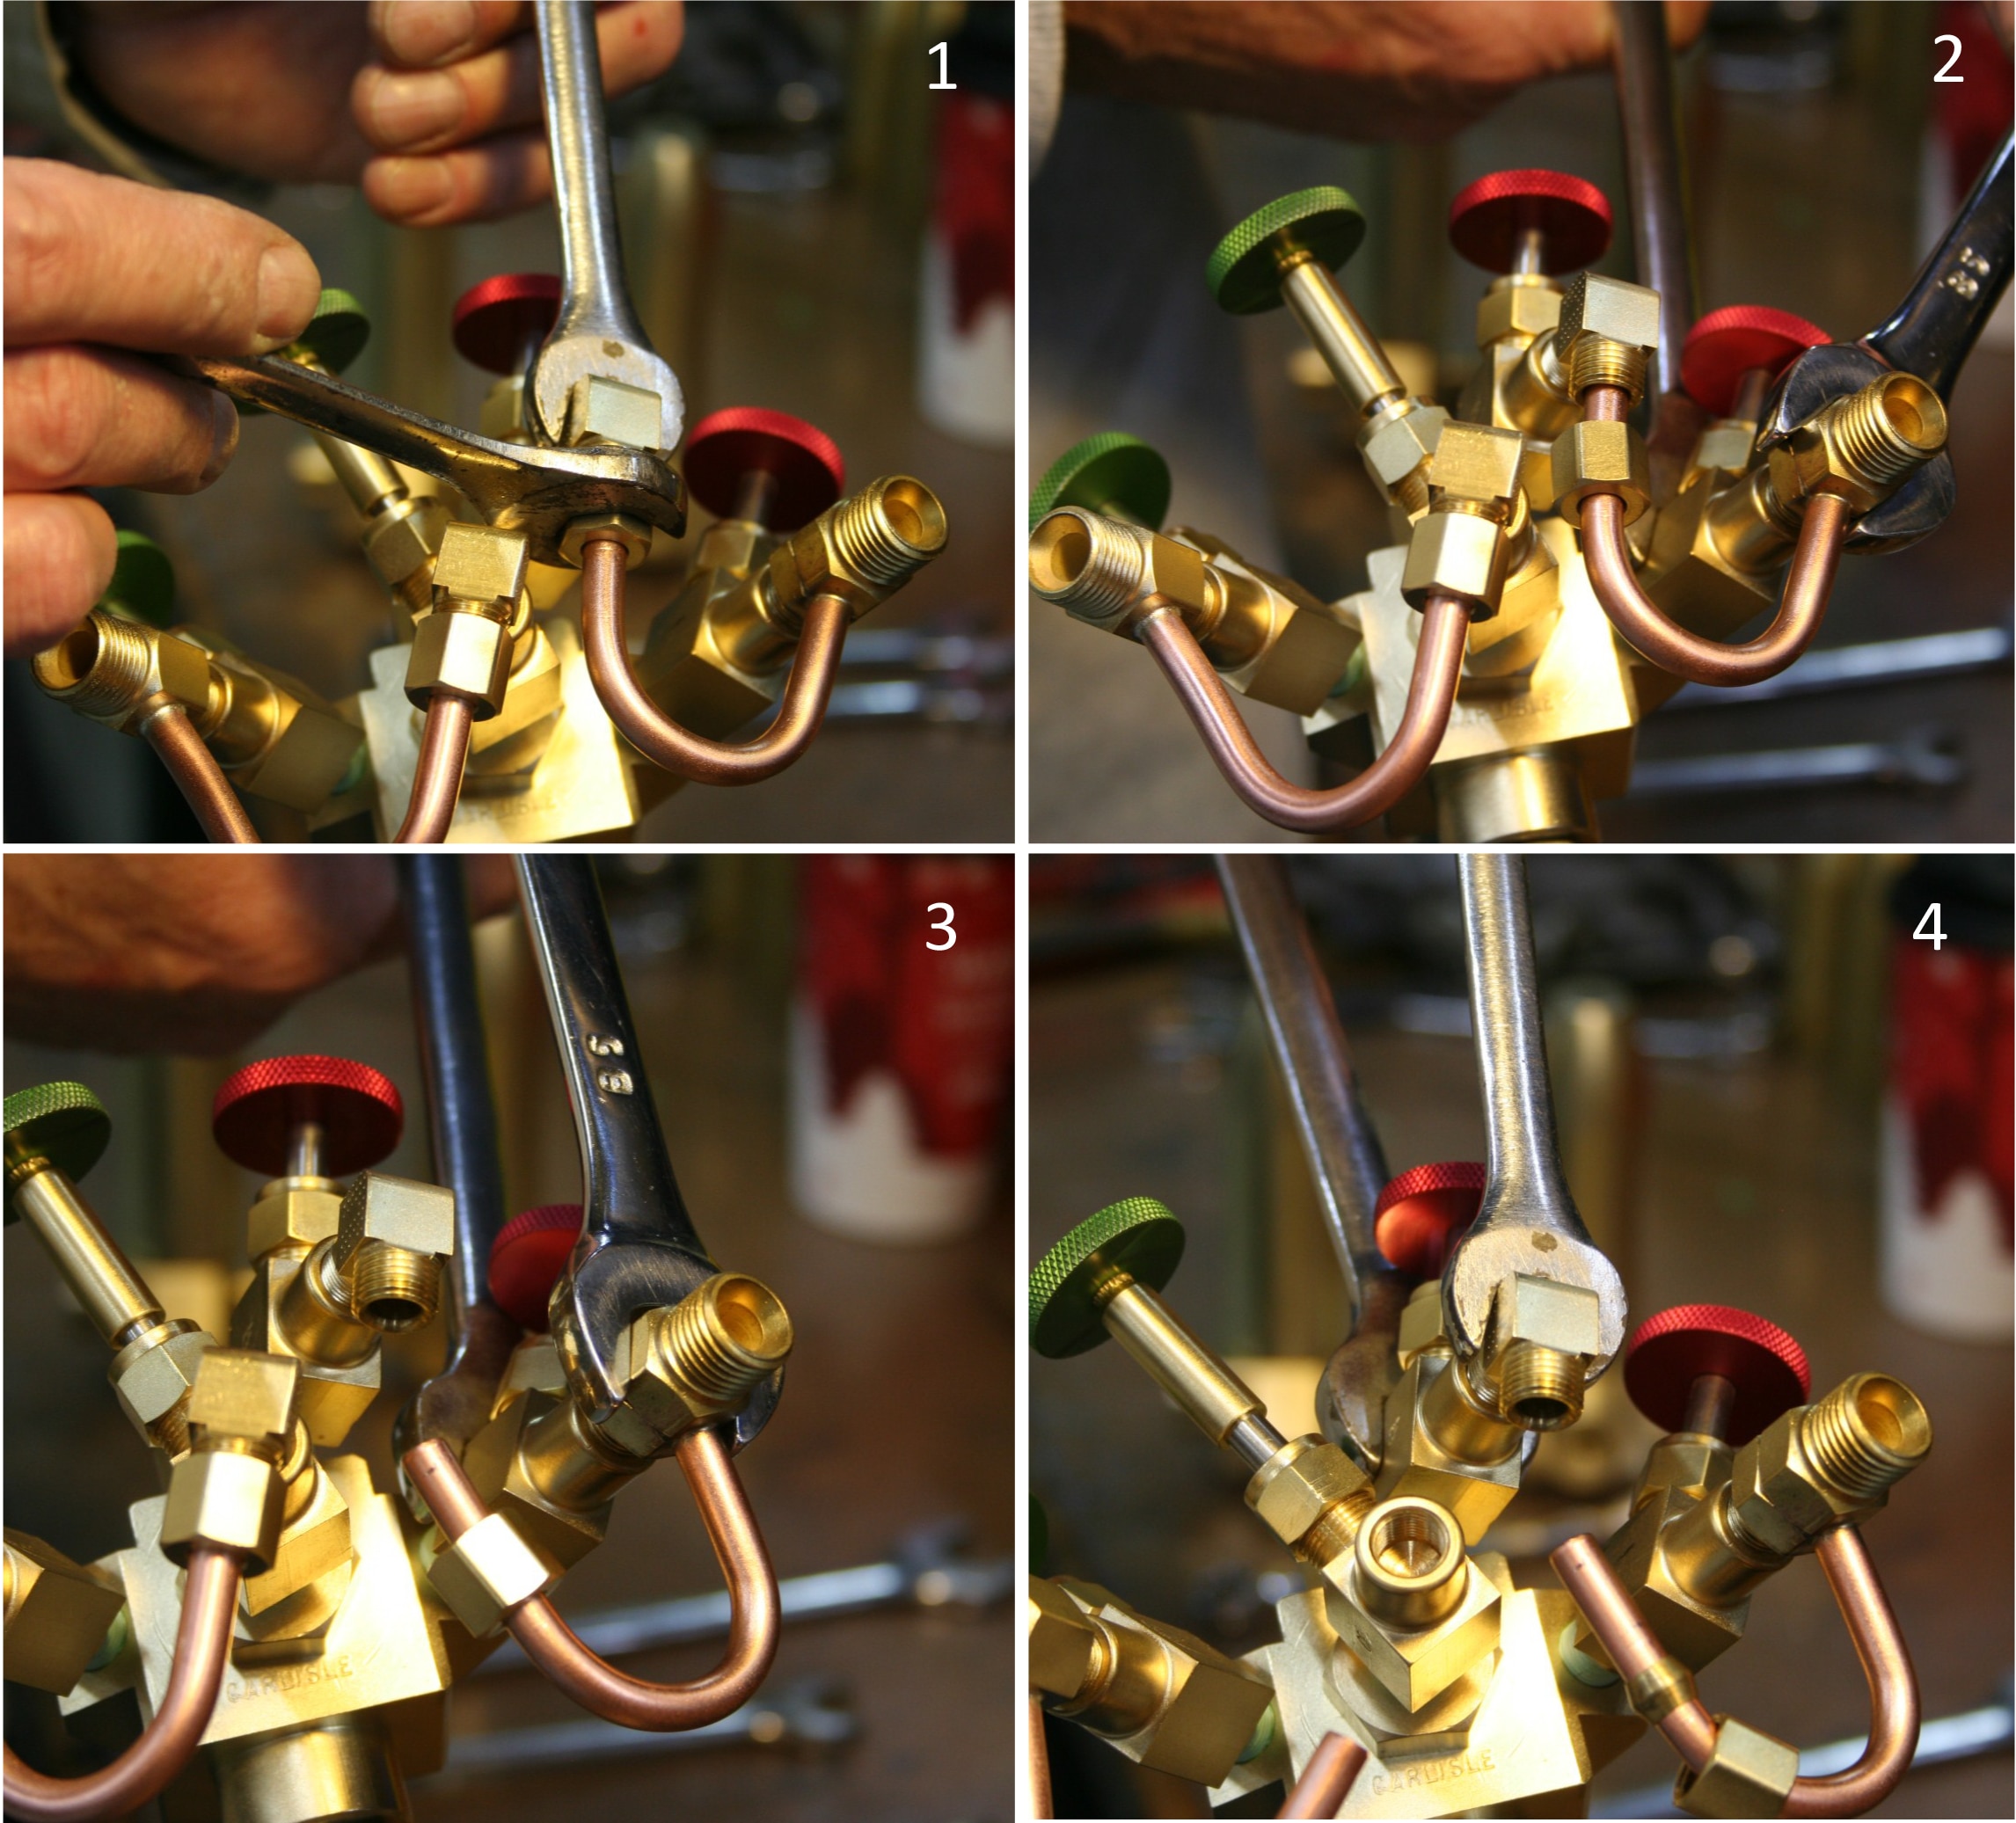
1) Using a backer wrench, loosen compression fitting nut.
2) Then loosen crossover.
3) Unscrew crossover from compression fitting.
4) Then remove compression fitting elbow.
5) Remove compression fitting elbow.
6) Remove crossover.
7 And 8) Unscrew valve nut and unscrew valve stem then remove valve.
Now install new valve and repeat steps 8– 1 in reverse order.
